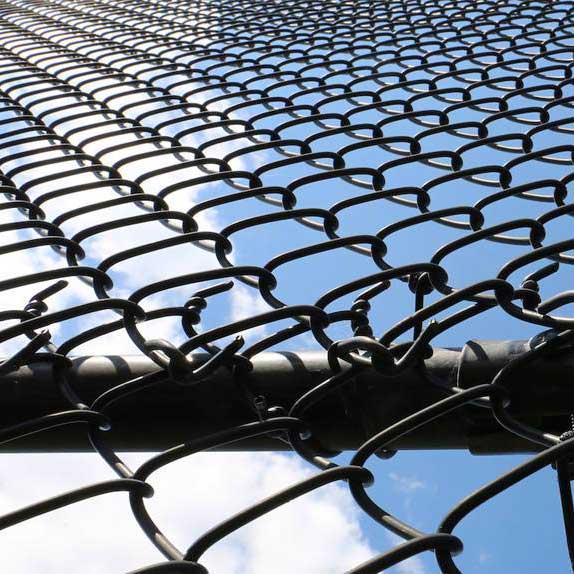
Chain-link fencing isn’t as aesthetically pleasing as many other types of fences, but it’s affordable and gets the job done. Homeowners nationwide usually pay
between $1300 and $3800 to
install a standard chain-link fence (including professional labor costs), making the average overall cost around $1650.
Most fencing contractors will charge for fence installation by the linear foot, with an average rate of about $20 per linear foot for chain-link fencing. Depending on the height of the fence, the gauge of the chain-link mesh, and other project-specific factors, your rate could range anywhere from $6 to $21 per linear foot.
Chain-link Fence Cost for Your Yard of Home
Typical price range: $1300 - $3800
How Much Does Chain-Link Fencing Cost?
-
National average cost: $2,218
-
Typical price range: $1,000 – $4,194
-
Extreme low end: $600
-
Extreme high end: $5,935
Even though chain-link fences seem exceedingly simple, they actually vary quite a bit from project to project, which means the overall cost varies, too. The size of your fence, its height, and the quality of the material it’s made from can drive your overall cost as high as $5,935 or as low as $683.
Including professional labor and material costs, you can expect to spend $1000 to $4,194 (or $2,218 on average) on a chain-link fence for a typical residential yard. The area you live in or the specific contractor you hire might make your chain-link fence cost much different from these national averages, so keep those extreme high end and low end numbers in mind when budgeting, too.
Chain-link Fence Cost Estimator by Size
Of course, the more chain link fence you need, the more you’ll have to pay for it. When calculating the budget for your project, remember that most contractors charge an average of $20 per linear foot for chain-link fencing. You can estimate the overall cost of your project by multiplying how many linear feet of fence you need by 20.
If your chain-link fence installation is a little more complicated than the standard, such as if it’s on a slope or if you want a tall commercial-grade security fence, you may want to use the higher end rate of $31 per linear foot to calculate your estimate. However, if you only need a small and particularly simple fence, you can use the lower end rate of $11 per linear foot.
Using the national average rate, you can assume that you would pay about $1,687 total to fence in a small backyard or front yard of 510 square feet, about $3,205 for a mid-sized yard of 2,050 square feet, and about $3,140 for 3,400 square feet.

Chain-link Fence Coating
The simplest chain-link fabric is made with plain galvanized steel that includes a zinc coating to protect from rust and other corrosion. Including professional installation, a galvanized steel chain-link fence costs about $8 to $13 per linear foot.
Higher end chain-link mesh comes with thick layers of protective aluminum or vinyl coating. These types cost more than galvanized steel, but they also have potential to last longer. Aluminum-coated chain-link mesh runs at about $9 to $15 per linear foot, and vinyl-coated is the most expensive option at $11 to $18 per linear foot.
Chain-link Fence Gates

Chain-link fence gates vary in price depending on the style and size of the gate. Just like taller rolls of chain-link fabric cost more than shorter ones, taller gates cost more as well.
The way a gate opens also affects cost. For a standard swing gate, you would pay between $95 and $390. For a larger commercial-style rolling gate that works well for driveways, the price jumps significantly to about $550 to $1,600.
How to install a chain-link fence DIY in 17 steps
-
1. Measure before you buy your materials. The first step in installing a chain-link fence is figuring out how much material you need. To do that, measure the perimeter of the area you want to fence in (such as your front yard, backyard, or both). Calculate the linear feet of your fence project, and you’ll know how much chain-link mesh, how many posts, and how many hardware pieces you will need for your project.
-
2. Lay out the fence plan. Before you dig holes or install anything, outline where the fence will go using ground stakes and mason’s line (or an equally durable string). If you know how to make batter boards, you can use them to outline and measure the corners of the fence.
-
3. Mark spots for fence posts. Using spray paint, mark a spot every 4 to 10 feet along the outline you created with mason’s line. However you space them out, make sure the space between each mark is consistent all the way around the fence. Leave a few extra inches between gate posts so there’s room for the latch mechanism and hinges.
-
4. Dig post holes. Contact 811 (aka the “diggers’ hotline”) before you dig to make sure your project won’t interfere with any underground utility lines. Then, with your post hole digger, dig a hole on each spray-painted mark. Each hole should be three times wider than its post. Corner and end posts are larger than line posts, so those will need larger holes. For line posts, dig 4 to 6 inches deep. Dig 6 to 8 inches deep for corner and end posts. For both, dig 4 extra inches to make room for the gravel base.
-
5. Prepare gravel base. In each post hole, pour 4 inches of gravel and tamp it down using the bottom of the post or a tamping tool.
-
6. Mix concrete. Following the instructions that come with your concrete mix, get the concrete in liquid form and ready to pour. Most of the time, you’ll have to add only water. If you want the posts to set faster, use fast-acting concrete.
-
7. Install end, corner, and gate posts. Pour concrete into the holes for all end, corner, and gate posts. Set those posts in the wet concrete and use a level to plumb each one. You can either have a buddy hold the post straight or brace it with stakes. Fill the rest of each hole with concrete and slope the top of the concrete away from the post. Don’t do anything with the line post holes yet. Wait to move on until the concrete sets, which can take a few days.
-
8. Attach tension bands. Slide three tension bands onto each end, corner, and gate post — one toward the top, one toward the middle, and one toward the bottom. If your fence is taller than 4 feet, you will need more than three tension bands per post.
-
9. Attach gate hardware. On the gate posts, attach the latch and hinges in the approximate place they will need to be when the gate is installed. Do this for every gate if your fence includes more than one.
-
10. Install end post caps. Use a rubber mallet to hammer an end post cap firmly on top of every end, corner, and gate post.
-
11. Prepare line posts for installation. Fasten the looped line post caps to the top of each line post. Place each line post in the holes you have dug, sitting on top of the gravel base you poured earlier.
-
12. Install the top rail. Attach a rail end to each brace band, then run the top rail through the looped line post caps all the way around the fence. If you need shorter rails, cut them down with a pipe cutter. If you need longer rails, you can attach two of them together with a top rail sleeve.
-
13. Fasten the top rail. Fit each rail into the rail ends you have already installed, then adjust the rail’s height as needed to fit the height of the mesh you bought. When you have the rail at the appropriate height, tighten all the brace bands to hold it in place.
-
14. Fill line post holes. Keep the line posts plumb by having a buddy hold them or bracing them with stakes while you backfill the holes with dirt and pack it in firmly around the posts. You don’t have to use concrete for line posts.
-
15. Attach tension bars to the chain-link mesh. Roll out the chain-link fabric along the ground and install a tension bar at each end by weaving it through the links. The tension bar should give the fence its rigidity.
-
16. Install the chain-link mesh on the posts. Stand up the chain-link mesh and attach each tension bar to the tension bands you have already attached to the posts. When installed, the mesh should be raised 2 inches off the ground and hang over the top rail by 1 to 2 inches.
-
17. Stretch the mesh. Use a come-along cable puller winch to stretch the chain-link mesh so it doesn’t sag. Do this by inserting the tension bars short of the end and corner posts at first, then attach the cable puller and pull the mesh taut until the tension bar reaches the post where you will attach it. Reshape the mesh by hand if needed, such as if it sagged or distorted during stretching.
You can use the online consultation qunkun@qunkun.net to estimate the cost of chain fences in your area.
Seek help from a professional fence builder


.jpg)


.png)


